Mrs. Black's Science Class

February 23, 2010

Building Chemical Molecules: Carbon Chemistry

Filed under: Uncategorized — rsmscience @ 4:43 am

Here are some models we made in our carbon chemistry unit.

*********

Some of us showed more dexterity than Mrs. Black!!! :)Also

Also, students were so awesome, they were able to make molecules of different shapes like planar, tetrahedral, linear, and bent too!

Also, we were able to make different hydrocarbons forming different carbon backbone structures like straight, branched, and ring chains.

*****

And here are a few others that we made…look for the cool double bond ones!!!

*********

We figured at the end of the two days we spent on this that we can do this or activities like legos for days…it was fun!

Here is a short YOUTUBE Video on Carbon Chemistry. It’s a brief summary of what we discover in this unit.

Lewis and Clark’s Corps of Discovery: Plant Species

Filed under: Uncategorized — rsmscience @ 4:31 am

In a collaborative project with our English and History classes, students pretended to be part of the Corps of Discovery, discovered new plants, studied them, and gave them appropriate names. Here are our pictures…

**********

Also, stay tuned, as there are worked examples still to come soon…

Silly Putty Lab

Filed under: Uncategorized — rsmscience @ 4:25 am

Here are some pictures from our Silly putty lab, which taught students on the concepts of polymers and chemical bonding!

Borax solution (4 grams of borax to 100 ml of water for the perfect solution!)   

Glue Solution (1 part ELMER’s glue to 1 part water)  

To make the perfect silly putty, combine 1 part of each of the above-mentioned solutions (half a dixie cup of each) and 1 drop of food coloring to add some style! ********

February 6, 2010

2-3-2010: Neutralization Lab

Filed under: Uncategorized — rsmscience @ 12:03 am

Today, students experimented with vinegar (an acid) and baking soda (a base) in our neutralization lab. Students discovered the reactants of a neutralization reaction are an acid and a base; and the products of a neutralization reaction are water and a “salt.” A salt is an ionic compound made of a metal and nonmetal. Students were also introduced to another indicator called a universal indicator that was able to change several colors according to the strength of the acid or base. Here are some pictures of the lab:

**********

As students added more and more baking soda to the vinegar, the indicator changed colors to indicate to students how close they are getting to green, which is neutral with a pH of 7.  Here is a 7.

The best part of the lab was that the kiddos had to add SO MANY drops of baking soda to neutralize the vinegar; Some went up to 1000 drops!

KEY TERMS: Neutralization reaction, acid, base, water, salt, indicator, and pH

Here is a neat video to reinforce the concepts of acids and bases!

January 30, 2010

1-19-2010: Acids and Bases Lab

Filed under: Uncategorized — rsmscience @ 3:13 am

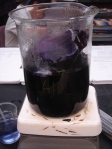
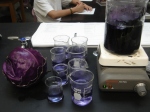
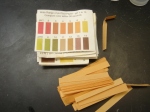
Today we ventured into the acids and bases. The purpose of today’s lab was to determine through the use of indicators and pH paper whether a certain substance was an acid or a base. Students know that INDICATORS like cabbage juice, red litmus paper, and blue litmus paper will change colors in the presence of an acid or a base. In other words, INDICATORS can only help us categorize the substances into one of the two groups, and are unable to tell as the strength of the acid or the base. Therefore, a more complete analysis requires the use of a pH scale. In our science classroom, practicality calls for the use of pH paper (way less expensive) over the use of an electronic pH meter. 🙂

Here are pictures of the indicators and the pH papers we used.

************

The following are pictures of several of the many substances we used. To have fun and keep the kiddos engaged, the more substances that are used and that are relatable to them is great!

***************

Here are the results of the tests that the students performed:

************

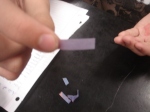
You can definitely see the different colors of the solutions after the cabbage juice was added and the results from the Red and Blue Litmus papers as well as the pH paper held up to the pH scale.

An A-ha! moment for the kiddos was when they learned that even after mixing the cabbage juice into the solutions, they were able to do the other tests! They found our through doing that indicators do not change the chemical make-up of the solutions; so, they other tests in the same solutions were unaffected by the cabbage juice! WOWZA! 🙂

KEY TERMS: solution, acid, base, indicator, pH scale, red litmus paper, blue litmus paper, hydroxide ion, hydrogen ion, strong base, weak base, strong acid, weak acid, corrosive, H+, and OH-

January 28, 2010

Mini-Labs on Solutions, Colloids, Suspensions, and Solubility

Filed under: Uncategorized — rsmscience @ 3:24 am

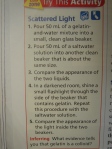
Our current unit on Acids and Bases began with introduction to different types of mixtures-namely solutions, colloids, and suspensions. The first activity students were engaged in was entitled, “Scattered Light.” In this activity, students observed the properties of two mixtures- a salt/water mixture and a gelatin/water mixture to classify the mixtures as a solution or a colloid.
*********

KEY TERMS FOR MINI-LAB #1: Mixtures, Solution, Colloid, Solubility

In the second mini-lab, students attempted to answer the question “What makes a mixture a solution.” Therefore, students were able to apply their knowledge of the definitions of a solute, a solvent, and a mixture, a solution, a colloid, and a suspension in this activity. Students started off by filling up two dixie cups half full with water. Then, students attempted to dissolve crushed black pepper and salt to the cups, respectively. Observing how the solutes (particles-pepper or salt) dissolved in the solvent (water), students were able to conclude whether they had a suspension, a colloid, or a solution.

***

KEY TERMS FOR MINI-LAB #2: solute, solvent, mixture, solution, colloid, suspension, solubility.

In the third and last activity, students were charged to investigate whether certain substances will dissolve in water; also, students needed to analyze their data and conclude whether the physical state of matter determines whether the substance will or will not dissolve in water.

************

Students used the same steps as in mini-lab #2 to investigate how well different solutes like soap flakes, vinegar, vegetable oil, table salt, sugar, and black pepper will dissolve in water. In the end, students should notice that the physical state of matter in which the substances exist do not affect its level of solubility in water.

KEY TERMS for Mini-Lab #3: solute, solvent, solubility, state of matter, liquids, and solids

January 14, 2010

1-13-10: Chemical Reactions Lab

Filed under: Uncategorized — rsmscience @ 12:58 am

Today’s lab on chemical reactions is a revisit to our earlier unit of physical and chemical changes. The purpose is to connect student’s prior knowledge to what we are about to cover in our current unit on chemical reactions.

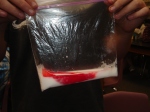
************

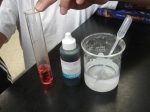
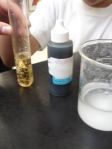
The purpose of the lab is to see what will happen when we react the above-pictures substances: calcium chloride, baking soda, and phenol red. Students learned today that phenol red is one type of INDICATOR used to determine whether a solution is acidic or basic. Students were also introduced to the pH scale and pH paper in this lab to determine the STRENGTH of the acid or base.

Students discovered that the pH scale ranges from 1 through 14, with 7 being neutral, 1 being the most acidic, and 14 being the most basic solution.

***

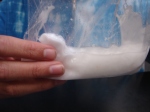
Students created a CLOSED system inside of a plastic zip-loc bag. 2 teaspoons of Calcium chloride, 1 teaspoon of baking soda, 1 half pH paper, and a sealed film cannister of the phenol were placed inside of the CLOSED SYSTEM and observations were made before the reaction. The opening of the film cannister to allow the phenol red to touch the powders ACTIVATED the reaction. Students meticulously observed for the clues/evidence of a chemical reaction.

Some of the observations were: gas formation, heat production (EXOTHERMIC REACTION), and an odor change. Students should have also noticed a change in the color of the substance due to the phenol red indicating whether it was acidic or basic. Also, the pH paper should have indicated the exact strength of the acid or the base.

I think the best part was the overwhelming heat production! It was awesome for the kiddos!

KEY TERMS: activation energy, reactants, products, exothermic and endothermic reaction, closed system, open system, indicator, pH scale, acid, base, physical change, chemical change, and the evidences of a chemical reaction-color change, heat/light/sound production, gas bubbles, precipitate.

January 12, 2010

Thursday, 1-7-10: Bond with a Classmate

Filed under: Uncategorized — rsmscience @ 12:11 am

Borrowed from Liz at Middleschoolscience.com, the kiddos pretended to be ions (charged particles) – cations (positively-charged) or anions (negatively-charged)- and then bonded with a classmate of the opposite charge. We used approximately 24 different commonly seen ions as shown below. Here are some of the combinations. Students learned a lot about bonding, which types of elements become positively-charged and which become negatively charged, and what types of compounds are formed as a result of the bonding.

*********

This lab was used to reinforce our chemical bonding unit. Not only were the kiddos able to figure out what ions can bond together, they discovered how to write chemical formulas based upon the given combinations, as well as to note the proportion of each element in a given compound given the subscripts produced from the bonding of the various elements.

KEY TERMS ILLUSTRATED: Chemical bonding, ionic bonding, covalent bonding, subscripts, oxidation number, ions- cations and anions, electrical charges, and neutral compounds.

Here is a pdf file of the activity: http://www.middleschoolscience.com/bonding.pdf

And here are the tags: http://www.sciencespot.net/Media/chembond.pdf

January 7, 2010

Wednesday, 1-6-10: Time to Look at the Borax Crystals

Filed under: Uncategorized — rsmscience @ 12:45 am

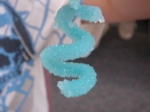
The crystals turned out very nicely. Take a look!

A spiral…..A Spiral….beaker tongs..….pretzel..

That’s not all…there are more!

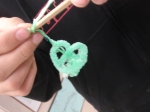
A letter “B” …. ….hearts…

and an assortment of others….

Students were able to use this activity to conceptualize ionic bonds and the structures they make. Also, the post-lab questions allowed students to connect the activity to various other concepts like mixtures, physical changes, physical properties, particles that make up the states of matter, and the molecular motion involved in phase changes.

January 6, 2010

Tuesday, 1-11-10: Ionic and Covalent Bonds Lab

Filed under: Uncategorized — rsmscience @ 1:23 am

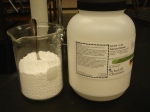
Today’s lab is an application of factual concepts of ionic and covalent bonds. Students have discovered that ionic bonds and covalent bonds have dissimilar characteristics. Ionic bonds are hard and brittle, harder to burn because of their strong bonds, have higher boiling and melting points, are made between metals and nonmetals, can conduct electricity because they are made of charged particles called ions, and when bonding occurs, the valence electrons are transferred.  On the other hand, covalent bonds are formed between nonmetals, burn easily because the bonds are weaker, have low melting and boiling points, do not conduct electricity, form molecules like water, and when bonding occurs, valence electrons are shared.

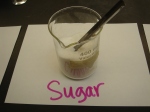
Students used six household substances. The purpose was to conduct tests relevant to their characteristics to determine whether the substances were ionic or covalent bonds. One of the three tests was a burning test.  Students used an unfolded paper clip and water to hold the substances over a flame to see whether they burned easily or not.

***********

Students also test for electrical conductivity.  Stations were set to allow students to rotate through six solutions made of the six substances. Conductivity kits with an add-on of copper metal strips were used to enable testing.

*************

Students also looked at the chemical formulas for each compound and analyzed the make-up of elements to determine whether the substances were ionically bonded or covalently bonded.  An example was provided for baking soda with the chemical formula of NaHCO3. This chemical formula was made up of: metals-Na; and Nonmetals-H,C,O. Therefore, this is an ionic bond.

Older Posts »

Blog at WordPress.com.